Cherry Vanilla Balsamic Shrub Recipe

11:18 AM , 0 Comments

Once again, I’m a Canbassador. That means I receive a couple shipments of stone fruit, more than enough to preserve, and I share my results and recipes with you. I already received a large box of dark red cherries and will be working on peaches next. Dark red cherries have an intense flavor, they hold up well with other strong flavors and with that in mind I made two different recipes--Bourbon Cherries and Cherry Vanilla Balsamic Shrub.

I’m afraid I didn’t pay as much attention to the recipe for Bourbon Cherries as I should have, and they will need four weeks to “settle" so I will not be trying them for bit longer. I also froze some cherries, which is very easy to do. I just washed and pitted them and put them in the zip top bag, and froze it as flat as I could. The cherries don’t seem to have stuck to together. And I dried a small batch of cherries in my toaster oven, but it took a very long time and I’m not sure I’d do it again.

By the way, if you have a large amount of cherries to pit, I highly recommend this pitter that cleanly and easily pits 6 cherries at a time! It's a bit pricey, but definitely worth it to avoid the mess and hassle when you have lots of cherries to pit. 

The other recipe I made was a shrub. As you may recall, shrubs are vinegar based drinks, often made with fruit. Making shrubs is a great way to use fruit that’s not perfect. The riper the fruit the better. Basically you combine fruit with sugar and water, then let it sit for a while then add vinegar. You can also add aromatics. This was my first experiment and it turned out rather well.  Once you make a shrub the easiest way to serve it is with bubbly water, but it’s good in cocktails and to flavor hard sparkling cider. 

The cherries leftover from making the shrub have a kind of pickled flavor since they were sitting in a vinegar solution for a full week. They are great as an accompaniment to cheese or in green salads. I recently made a salad with hot smoked salmon, red onions and avocado and the shrub cherries added just the right tangy note. 

The Sweet Preservation website has some preservation basics as well as recipes for canning stone fruit, if you're looking for more ideas. Also check out the community site, Punk Domestics. 

Cherry Vanilla Balsamic Shrub 

Ingredients

About 4 cups washed and pitted cherries 
2 cups sugar
1 cup water
2 cups vinegar--I used a pleasing combination of balsamic and Champagne vinegar
1-2 vanilla beans, sliced open, end to end

Instructions

Place the fruit and sugar in a large wide mouthed glass jar and smash it with a muddler or a wooden spoon. Add the water, stir until the sugar begins to dissolve, then cover and let sit for 24 hours. Add the vinegar and vanilla beans and stir again until the sugar is dissolved. Let the mixture sit in the refrigerator for a week. Strain the cherries out of the liquid and filter through a fine mesh strainer. Store in the refrigerator and mix with bubbly water, sparkling cider or use in cocktails.

Enjoy!

Disclaimer: I received stone fruit as part of my Canbassador role, I was not monetarily compensated for this or any other post on Cooking with Amy. This post includes an affiliate link. 

0 comments:

Summer Vegetable Cavatelli with Fresh Corn “Cream” – Corn Not Cows!

10:52 AM , , 0 Comments

There’s a restaurant near us that features a burrata-filled tortellini, served in a cream sauce fortified with fresh, sweet corn. It’s a wonderful dish, and was the inspiration for this simple, summer vegetable cavatelli.

I was going to use reduced cream, with fresh, pureed corn stirred in at the end, but then I had a thought. What if skipped the dairy altogether, and made the sauce 100% cob-based? I was also out of cream.

So, I blended the fresh corn with some chicken broth, and ended up with what looked like corn milk. At first, I thought I’d made it too thin, but after a few tests reducing some in a pan, I realized it was thickening up beautifully.

While I was very happy with this, in hindsight, I’d do a few things differently next time. I went with pancetta, but I think the smokiness of bacon would have made this even more delicious. I also think you should probably add the corn cream to the vegetables, and bring it to a simmer before the pasta is added.

Of course, this recipe will work with whatever fresh seasonal vegetables you happen to find at the market, as long as its something that tastes good with sweet corn. In related news, everything tastes good with sweet corn. I hope you give this a try soon. Enjoy!


Ingredients for 4 portions:

For the corn “cream” (will make more than needed for the recipe)
2 ears fresh white corn, or other sweet corn
2 cups chicken broth or water

For the pasta:
2 cups cavatelli
1 tbsp olive oil
4 ounces diced bacon or pancetta (sausage would also work nicely)
1/2 cup diced sweet red pepper
1 1/2 cup diced zucchini
pinch of cayenne
salt and pepper to taste
1 1/2 to 2 cups corn “cream,” or as needed
1 cup halved sweet cheery tomatoes
1 tbsp chopped Italian parsley
1 tbsp finely sliced basil leaves
grated Parmigiano Reggiano

0 comments:

Root Vegetables: 2 Ways

10:25 AM , 0 Comments


Do you have a purpose when you go to the Farmer's Market?  I usually wander around aimlessly, wanting everything but afraid to commit.  It would probably benefit me to treat it like any food shopping experience, with some sort of recipe or meal plan in mind.  But sadly, I'm not that organized of a person.  Especially when it comes to food.  The old, Dutch, fat man that lives inside of my appetite usually takes over, and I want to buy everything... but I always chicken out and leave with next to nothing.  It's very frustrating!  I need help from you people that instragram your Farmer's Market purchases every Sunday, because I know you're better at it than me.

Last week, I left with radishes and golden beets.  That's it!  No one in my house even likes them, besides me!  (Oh, and I also bought a log of mozzarella cheese because... fat man.)  I was determined to not let my purchases sit there mockingly, until they shriveled up with mold.  So I prepared them both in the easiest ways possible, roasting one and quickly sautéing the other.  And guess what?  My family loved them!  (My family = Carson, my kids eat nothing.)  See below for my techniques...   


Beets...
Preheat oven to 375 degrees.  Wash beets and trim the leafy stems (reserving if you wish, they're edible).  Place beets on a baking sheet lined with foil.  Sprinkle with olive oil, salt and pepper.  Place another piece of foil on top of beets.  Roast in oven for 45 minutes to an hour.  Once cooled slightly, peel the skin off of the beets.  Slice, sprinkle with more olive oil, salt and pepper and serve!


Radishes...
Wash radishes and thinly slice them.  In a sauce pan, heat a tablespoon of unsalted butter and a tablespoon of olive oil.  Saute over medium heat for 15-20 minutes, until they caramelize (sometimes I add sliced shallots as well).  Season to taste with salt and pepper.

0 comments:

Monet's Palate Cookbook: The Artist & His Kitchen Garden at Giverny

2:40 PM 0 Comments

Years ago I wrote about Monet’s Palate, a charming film narrated by Meryl Streep. It delves into the life of Monet at his home in Giverny. Monet’s passions were painting and gardening, but he also clearly enjoyed the pleasures of the table—eating, drinking and entertaining guests. A new book, Monet’s Palate Cookbook is less about historical and sometimes antiquated and inaccurate recipes left behind by his cook, and more about his life in Giverny. It covers his approach to gardening, eating and entertaining with plenty of recipes of course. 

The book begins with his passion for good food, then moves seamlessly into his kitchen garden and many of the fruits and vegetables that were grown at the time, as well as the specific ones that were grown in his garden and details about how they were propagated. But the majority of the book is dedicated to recipes. The recipes are inspired by Monet’s kitchen garden at Giverny, but fresh and modern. Some of them refer to favorite dishes served to artists of the day—like bouillabaise for Renoir and others are from places he traveled to such as the Yorkshire Pudding from the Savoy Hotel in London. Finally there are recipes from famous chefs like Michel Richard and Anne Willan, inspired by his kitchen notebooks. 

The recipes include notes about their connection to Monet, and bits of trivia that Monet fans are sure to relish such as the fact that he brought back seeds for zucchini from Italy or that he imported bananas for ice cream to be served on Christmas. Recipes I’ve bookmarked include Roasted Cod with Fresh Corn, Red Peppers, Onion and Caper Salad, Roast Pork with Cherry Sauce, and Mocha Layer Cake. The book like the film extends the experience of visiting Monet’s home in Giverny. If you’ve been there it’s something you won’t likely forget and if you haven’t, it should be on your bucket list. 

Disclaimer: I received this book as a review copy, this page includes an affiliate link. I was not paid to compensated monetarily to write this or any other post. 

0 comments:

Mini Pies on TODAY

6:37 PM , , 0 Comments


I've been trying to write this post for a day and a half.  A day and a half!  Trying to balance life is a daily struggle of mine, and I'm sure you can all relate.  I have so much I want to cook, so much I want to share with you, and yet I'm trying to actually put my swimsuit on this summer and go UNDERWATER with my kids.  As in, who cares about how cold the water feels or what my hair looks like or having to shower after (or not).  I'm trying to play with my kids!!  And so my to-do list grows and grows and grows... WHY IS BALANCE SO HARD.

Back to trying to share with you, my virtual friends.  Yesterday I had so much fun baking mini blueberry pies with my friend Savannah on Today.  It was a Today Original recipe, and they were simple and delicious.  Yes, yes, I may have made a few mistake during the segment, but I think you know that I embrace errors in the kitchen and I certainly try not to take cooking too SIRIously.   

You can check out the segment and view the Today Original recipe here.


All photos by Samantha Okazaki

0 comments:

Can-It-Forward & Canning Jars Giveaway!

1:07 PM 0 Comments

Cherry Vanilla Balsamic Shrub, Bourbon Cherries & Pickled Cherries
Once again I’m participating in two events that dovetail rather nicely. This Saturday is Can-It-Forward day hosted by Jarden Home Brands and they have generously sent me some canning supplies and are offering a giveaway of a coupon for a case of Ball jars (see the end of the post for how to win). I’m also a “canbassador” for Sweet Preservation, helping to share the joy of preserving fresh fruit from Northwest Cherries and the Washington State Fruit Commission. Fresh fruit and canning supplies! It’s a match made in heaven. 

Jarden is the maker of Ball, my go to brand for canning supplies. I use their jars, labels, lids, bands and pectin. They are now making some additional colorful stuff like mix and match lids and bands and Sip & Straw lids for wide mouth jars. I’ve always been a fan of Ball canning supplies, they are readily available, well priced and the brand also offers some great resources, in particular their Ball Blue Book Guide to Preserving

While preserving is an ancient craft, there's new information practially every year. The guidebook is a resource I turn to frequently for technical information and tutorials as well as for recipes and inspiration. The current efition has 200 pages and over 500 recipes. Another resource is their canning website, Fresh Preserving
So what is Can-It-Forward day? Think of it as a reminder to go ahead and plan on preserving your favorite fresh produce in peak season. There will be a webcast with experts where you can submit home canning questions to be answered in real time. There will be recipe demos, a behind the scenes look at recipe testing and development and the science behind ensuring safety in home canning recipes and more. Tune in to the live webcast from 11:00am – 4:00pm EST.

As you can see, I've already done some preserving! I made Cherry Vanilla Balsamic Shrub, Bourbon Cherries and Pickled Cherries. I also froze some fresh cherries to use later in the year. In my next post I’ll be sharing my recipe for Cherry Vanilla Balsamic Shrub. But today I received my second batch of fruit, peaches. So...

...If you’d like to enter the giveaway, let me know how you would preserve peaches to enjoy later—jam, sauce, in syup. etc.in the comments section. You must be a US resident to win and have a US mailing address. Include your email in the comments form, only I will see it. Contest ends August 1, 2015. 

Good Luck! 

Disclaimer: Jarden Home Brands supplied this giveaway and sent me canning supplies and Sweet Preservation sent me fresh fruit. I was not monetarily compensated for this or any other post on Cooking with Amy. 

0 comments:

Turkish Chicken Kebabs – Expect More

I’d like to think that all the chicken coming off American grills this summer will be as tasty, juicy, and tender, as these Turkish chicken kebabs, but I know better. This has nothing to do with cooking skills, or quality of grills, but rather the unremarkable residue of low expectations.

People simply don’t expect much from their grilled chicken, and that’s exactly what they get. They use too little seasoning, and way too much time on the grill, followed by the inevitable barbecue sauce cover-up. Sure, the chicken was dry, but at least we couldn’t taste it.

It doesn’t have to be this way. By using a flavorful, yogurt-based marinade, like the one seen herein, even inexperienced grillers can produce impressive results. The acid and calcium in the yogurt tenderizes the meat, and unless it’s horribly over-cooked, you’ll be enjoying the kind of succulent chicken you didn’t even realize was possible.

Like I mentioned in the video, I’m not sure how "Turkish" this is. It’s loosely based on a lamb marinade I’ve used for a long time, but it really worked beautifully on these thighs. I really hope you give this easy, and very adaptable recipe a try soon. Enjoy!


Ingredients for 4 large portions:
1 cup plain whole milk Greek yogurt
2 tablespoons olive oil
2 or 3 tablespoons freshly squeezed lemon juice
2 tbsp ketchup
6 finely minced garlic cloves
1 tbsp kosher salt
1 teaspoon freshly ground black pepper
1 tbsp Aleppo red pepper flakes
1 teaspoon paprika
1 1/2 teaspoon cumin
1/8 teaspoon cinnamon
2 1/2 pounds boneless skinless chicken thighs
4 long metal skewers

0 comments:

The Best Chocolate Chip Cookies. Ever.

9:27 AM , , 0 Comments

I know, everybody says that, but I really mean it. These are, these have to be, the best chocolate chip cookies, ever. Crispy around the edges, chewy and chocolaty in the middle, and thin, oh so thin.

The only way someone doesn’t love these, is if they prefer thick cookies instead, which, in that case, makes their opinion invalid, since they’re obviously crazy. Besides, you know you can just press two thin cookies together to get a thick one. Right?

My “secret” formula has been adapted from Alton Brown’s famous, “The Thin” recipe, and is fairly foolproof. The only real variable is the baking time, since we all scoop slightly different amounts. Mine took about 12 minutes, but if you make yours a little bigger, or smaller, that time will change.

And yes, of course you can add nuts to yours! I’m a walnut guy from way back, but decided to go sans nuts for this video. Speaking of nuts, you’re nuts if you don’t try this very simple, and amazing chocolate chip cookie recipe soon. Enjoy!


Ingredients for about 32 Chocolate Chip Cookies (depending on size):
2 1/4 cups all-purpose flour
1 1/4 teaspoons kosher salt (or 3/4 teaspoon of fine table salt)
1 teaspoon baking soda
2 sticks (1 cup) very soft unsalted *butter (be sure the butter is room temp, and very, very soft!)
*I used a high-quality European-style butter, and recommend you do the same. Cheaper butters will have more water content, which can affect the fat ratio, and thickness of your cookie.
1 cup sugar
1/2 cup light brown sugar
1 1/4 teaspoons vanilla extract
2 tablespoons milk
1 large egg
2 cups semisweet chocolate chips
- Bake at 375 F. for about 12 minutes

0 comments:

TODAY Show: Eggplant 3 ways

5:29 AM , 0 Comments


Well, "veggie week" at the Today Show has come and gone, and I may have converted Carson (and Savannah) a teeny, tiny bit with my greek yogurt eggplant dip (however it's true, eggplant is technically a fruit... whatevs).  If you missed yesterday's segment, or want the recipes (plus a delicious bonus stuffed eggplant recipe), check everything out here!

AND, I'll be back on TODAY on Monday, baking up something summery and sweet.
Have great weekends!

(photo by Samantha Okazaki)

0 comments:

Next Up: Chocolate Chips Cookies

12:08 PM 0 Comments


0 comments:

TODAY tonight: Cauliflower Steak


If you're unfamiliar with my "TODAY tonight" series, it's when Carson won't stop talking about something he ate at work, so I make it at home to shut him up.  However, this time around, I didn't even have to wait to hear him rave.  I was watching Aarti Sequeira on the show and I instantly wanted everything she cooked.  She made cauliflower three ways, and I could practically taste the vibrant, Indian flavors through my TV screen.  

It was the "cauliflower steak" with a lime yogurt sauce that made me run to the store for the vegetable.  I cook cauliflower a lot, but something as simple as cutting it differently and marinating it with different spices completely transformed it for me.  I am obsessed.  Even my son loved it!  I will make this again, and again, and again.  Recipe here.

And speaking of Today Food and vegetables, I will be there tomorrow trying to get Carson to eat a particular one he doesn't like... wish me luck!


We served it with a version of this salad because we just can't get enough.

0 comments:

Grilled Prosciutto-Wrapped Peaches with Burrata and Basil – An Exceptional Summer Exception

There are many people, myself included, that think cooking prosciutto is basically a crime against nature; but there are exceptions, and this plate of grilled peaches with burrata is one incredibly delicious example. 

Having said that, I used a domestic version, which works beautifully here, so we’re not expecting you to use up your precious prosciutto di Parma.

As far as the peaches go, you want something ripe, and sweet, but still somewhat firm. Above and beyond not being too soft, you must also make sure you’re buying “freestone” peaches. Non-freestone varieties will not separate as seen in the video. Ask the produce person at the market, and if they’re not sure, have them cut one open. They’re usually happy to do so!

After you talk to them, head over to the cheese department, and pick up some burrata. This extra rich and creamy cousin of mozzarella is not that hard to find, and really puts this over the top. You could use a nice, fresh mozzarella, or even a full-fat ricotta instead, but, if at all possible, find some burrata, and treat yourself to one of the world’s great cheese experiences. I hope you give this great summer recipe a try soon. Enjoy!


Ingredients for 2 large or 4 small portions:
2 ripe, sweet, but not soft peaches (must be “freestone”)
3 or 4 thin slices prosciutto, torn in ribbons
6 ounces (about 3/4 cup) burrata cheese
salt and pepper to taste
extra virgin olive oil as needed
1 tbsp finely sliced fresh basil leaves

0 comments:

Nectarine Salsa

7:08 AM 0 Comments

Untitled

Here's a great little salsa that's perfect with grilled pork of some sort, or with chicken. I hope you'll enjoy it!

Nectarine Salsa

2 large nectarines, diced
200 g cherry tomatoes, quartered
1 red onion, finely diced
1 lime, juiced
2 tbsp mango chutney
1 tbsp olive oil
salt, pepper


Mix everything together and let it sit for a little while before serving.

0 comments:

Kale, Quinoa and Chicken Salad


People, it's hot.  Like, real hot.  Like, I thought I'd sit outside for a minute with my computer and let my just-showered-hair (after 3, fine 4 days) dry in the summer breeze until I realized my boobs were already sweating HOT.  When it's this hot, I feel the need to eat really light, probably because my body feels bloated and heavy and I also want nothing to do with the kitchen.  This is, eat lots of vegetables (and sip white wine for lunch?) type of weather.  But I always forget how easy it is to throw a salad together for lunch.  For some reason it doesn't SEEM easy, but with leftovers involved and some minor weekend prep, a week-day salad can be effortless.  See the one I just made below...


Kale, Quinoa and Chicken Salad
Serves 3

1 bag frozen quinoa with vegetables* (or 2 cups cooked quinoa)
3 cups baby kale
1 cup shredded roasted chicken
1 avocado, diced
3 Tbsp pine nuts, toasted
1/3 cup crumbled greek ricotta** (or goat cheese, or feta)
Balsamic glaze
Olive oil
Salt and pepper

Prepare quinoa as instructed on bag (I did this Sunday night and kept it in tupperware).  Assemble rest of ingredients and toss.  Drizzle with balsamic glaze and olive oil, and season to taste with salt and pepper. 


*Found this in the organic section of the freezer.
**Sometimes I get in a feta/goat cheese rut, so I tried this Greek ricotta the other day and I'm OBSESSED!  So creamy.

0 comments:

Next Up: Something with Peach

9:31 AM 0 Comments

I think I’m going to start a new tradition, where the first video I post after a vacation, is whatever the most delicious thing I had during my time away was. I don’t want to spoil the surprise, but I can tell you it involved peaches, and was amazing. Stay tuned!

.

0 comments:

Instagram baking challenge 2

6:47 AM 0 Comments

Untitled

For our second week of Instagram Baking Challenge, we made these overnight rye buns. I wasn't crazy about the result - they look pretty but tasted a bit boring. So no recipe this time! But do follow us on Instagram and join in the fun!

0 comments:

Pasta with Arugula Pesto on TODAY

12:17 PM , 0 Comments


In case you missed my Today Show segment yesterday or need the Bow-Tie Pasta with Arugula Pesto recipe, click here for both!  And I'll be back next Thursday... trying to get Carson to eat his veggies.  It should be entertaining :)  Have a great weekend!  


Photos by Samantha Okazaki.

0 comments:

Tuna Avocado Toast + Bertolli Contest


Want to know something?  I love olive oil.  Some women collect shoes, or handbags, or jewelry... and I collect olive oils.  One of my favorite brands, Bertolli, is celebrating their 150th anniversary and they sent me that beautiful anniversary bottle above.  It's so pretty!  I want to carry it around like a handbag or wear it on my feet!  I'm very normal!  Anyway, to celebrate, Bertolli is having a recipe contest in which you could win a trip to Tuscany (as well as other prizes) just by submitting a dish using Bertolli oils.  Check it out here and enter soon, the deadline is July 31st!

The other night, using Bertolli olive oil (duh), I tried to recreate a dish we recently had at the Manhattan Beach, CA restaurant Love and Salt.  If you follow me on Instagram, then you know I pretty much fell in love with this restaurant right away.  We ate insanely crispy yet juicy roast chicken, and pasta with bone marrow (yup), and a salad with crispy garbanzo beans... all while sipping spicy margaritas.  And we began the meal with an albacore tuna and avocado toast.  This toast was something magical... every bite so full of bright texture and flavor.  I could have made love to the toast alone... perfectly crispy and probably soaked in delicious olive oil.  Creamy avocado, with a hint of lemon, topped with fresh, chunky tuna that melted in your mouth, and sprinkled with some sort of olive (caper?) mixture and a sliver of onion.  Am I still talking about this toast??

I thought it would be the perfect appetizer to make with my fancy olive oil, see what I did below...      


I had ciabatta bread leftover from our local pizza joint, so I used that, however you could use sourdough or french bread.  Just slice, and sauté on the stove in a splash of olive oil over medium heat until both sides are golden.  Take a can of solid white albacore tuna (soaked in water), drain and place in a bowl.  Scoop out an avocado into another bowl and mash with a fork.  Take the juice of half a lemon, and sprinkle over both bowls.  Drizzle both bowls with olive oil, and sprinkle with salt and pepper to taste.  To assemble toasts, spread avocado first, then tuna and then top with some chopped kalamata olives (or use an olive tapenade).  Serve and enjoy!  
0 comments:

Fish Tikka Masala

7:05 AM 0 Comments


Untitled

Here's a dish we first got in one of those pre-planned grocery bags that are so popular in Sweden at the moment. We've tried several providers, and this particular recipe comes from City Gross. We actually like their service quite a bit, they're very reasonable and the food was good. This fish dish was our absolute favorite! So easy and so tasty, it's something we're definitely making again. We modified the recipe to work for us.

Fish Tikka Masala
serves 4

500 g white fish (we had cod) 

1 onion, chopped
2 garlic cloves, minced
1 tbsp fresh ginger, grated
2 tsp cumin
1 tsp turmeric
pinch of cayenne pepper
1 tbsp cooking oil
400 g crushed tomatoes (one can) 
400 g coconut milk (one can) 
1 tbsp concentrated vegetable stock
1-2 tsp honey
salt, pepper

Heat the oil in a large pot in low heat. Fry the onions, garic, ginger, cumin, turmeric, and cayenne pepper for a few minutes. Add the tomatoes, coconut and the concentrated stock and cook for ten minutes.  Taste, and season with honey, salt and pepper. Mix the sauce with a handheld blender until smooth. 

Dice the fish and add to the sauce. Let it simmer on low heat until it's cooked through.

We served it with cooked rice and a simple salad - the dressing is just plain yogurt with salt, dried mint, a tiny bit of sugar, and then thinned with a little water. 

0 comments:

Giant Chocolate Chip Cookie

3:22 AM , 0 Comments


Hello there!  Remember how last week I said I'd be traveling for a bit, but I'd check in and blog once in awhile?  Hahahahahahahahahahahahahaha.  That was before my almost-one-year-old decided to wake up at 4am every morning.  She'd be like, what, woman??!  My body is telling me it's 7am, so wake up, and make yourself that hot smelly drink with all of the fatty cream, and play with me!!  And so my days started in the wee hours of the morning, and by early afternoon my brain felt like mush.  Hence, no blogging.  However, that didn't stop me from making cookie dough.  Because when you're out of town for a week and your brain is mush, you need to buy basic groceries like bread and milk and brown sugar and chocolate chips.  I'm not normal.

One morning last week, at like 5:17am, I decided to make cookies.  Did I want to make a large batch?  No.  Did I want to make a small batch?  Not really.  Instead, I wanted to make one GIANT treat, for me to eat for breakfast (mushy brains are dangerous).  But for reals, what's more fun than a huge cookie... shared amongst friends or eaten alone in the dark before the sun comes up.
    
Giant Chocolate Chip Cookie

1/4 cup unsalted butter, room temp
2 Tbsp granulated sugar
1/2 cup brown sugar
1/2 tsp vanilla
1 egg
1 cup flour
1/2 tsp baking soda
1/4 tsp salt
1 cup of chocolate chips, or desired amount

Preheat oven to 350 degrees.  With a mixer, cream together the butter and both sugars in a medium sized bowl until light and fluffy.  Add the vanilla and the egg, and mix until combined.  Add the dry ingredients, and mix until just combined.  Stir in the chocolate chips.  Place onto a cookie sheet lined with parchment paper, and flatten into a circle (should be about 1-inch thick).  Place cookie sheet in the fridge for about 30 minutes, and then bake for 15-20, until cookie has browned slightly.       

0 comments:

Instagram Baking Challenge number 1

6:45 AM 0 Comments


Untitled

Those of you who follow me on Instagram might have noticed that I've started up something called Instagram Baking Challenge together with my friend Dagmar. Each Sunday, we choose a recipe to make the following week and then we post about it with the tag #instabakingchallenge

Anyone can join in! The idea is just to get us inspired to bake again, no pressure! For our first week, we made this delicious and easy bread, originally posted by Matgeek. It's really simple and my kids loved it - I made two batches that were completely devoured. 

Rye bread with crushed rye and molasses 
Yield: 2 loaves

300 g water
60 g rye flour
60 g crushed rye
300 g water (again)
25 g fresh yeast 
20 g salt 
50 g butter at room temperature
600 g all-purpose flour 
40 g dark syrup/molasses

Bring the first 300 g of water to a boil. Measure rye flour and crushed rye into a bow and add the hot water. Stir well until smooth. Cover and let it cool. 

Heat the second 300 g of water until just tepid. Crumble in the yeast and let it dissolve. Add salt and butter. 

Add all the rye batter from the first step. Add flour and syrup as well. Stir until smooth, cover and leave for ten minutes. 

Knead for 5-6 minutes. The dough will be very loose, that's ok. 
Cover and let it rise for about 45 minutes or until doubled in size.

Turn the dough out onto a well-floured surface, divide in half and shape two loaves. Place in two buttered bread tins and leave to rise for 30 minutes. (Honestly, you can skip this step - just scrape the dough straight into the bread tins. It worked out fine.) 

Heat the oven to 250 degrees centigrade. Score the loaves and put them in the oven. Add some water or ice on a baking tray at the bottom or the oven or use a spray bottle - this is to create steam. 

Lower the temperature to 200 degrees. If the loaves start to look too dark, cover with aluminum foil. 

Bake until the core temperature is about 97 degrees. Leave to cool completely before removing to a rack.

0 comments:

Chef John is on Vacation!

9:18 AM 0 Comments

Just wanted to let everyone know that I’ll be on vacation this week. I'm looking forward to a nice, relaxing break, and if everything goes according to plan, I will accomplish absolutely nothing. 

We’ll continue to publish your comments and questions, but unfortunately, I won’t be around to respond to the tiny fraction of them I usually do. That means you’ll have to rely on each other, so good luck with that. Thank you for understanding, and we’ll see you next week!

.

0 comments:

Dill sauce for fish

6:37 AM 0 Comments

Untitled

Seriously, I don't know why I've posted so many sauces lately! I guess it's mainly what I've been making though - it's such an easy way to vary a meal. Here's yet another super sauce to serve with fish, especially fried and battered fish. (Although these in particular are bought frozen and baked - a simple shortcut which works well for us)

Dill sauce for fish
4 tbsp sour cream
1 tbsp mayonnaise
100 ml fresh dill, finely cut
1 tbsp chives, finely cut
salt
1/2 tsp honey

Stir everything together and season to taste. Let it sit in the fridge for at least half an hour. 

0 comments:

You’ve Entered the Calzone Zone

9:47 AM , , 0 Comments

I’ve never been a huge fan of the calzone, and I assume most people that don’t eat their pizza crusts feel the same way. However, since this has been requested hundreds of times, I thought I’d put my personal feelings aside, and give the recipe a shot.

I call it a recipe, but it’s actually a technique, since the calzone's greatest feature is its ability to accept any combination of cheese, meat, and vegetables as a filling. Today, calzones are most commonly stuffed with the exact same toppings that go on a pizza, which, besides the crust issue, was one of my main problems with it. I mean, why not just fold a pizza in half, and call it a day?

So, I decided to do what I hear is a more traditional filling, featuring ricotta, fresh mozzarella, and ham. The result was as enjoyable, as it was surprising. It was almost, but not quite, lasagna-like. The extra crust didn’t bother me as much, and everything seemed to work together beautifully.

I decided to recommend our Wolfgang Puck dough recipe, because it's fast and easy, and features a nice lightly textured dough, but any prepared pizza dough will work nicely. 

Just be sure to bake this long enough. If you make these the same size, it’s going to take about 15 minutes at 500 F. Your calzone may look nicely browned at 10 minutes, and it will be tempting to take out, but the dough will still be raw. You really want to push this to the point of almost burning.

And what happens if you go too far, and it does burn? No problem. Just order a pizza and fold it in half. So, whether you’re already a calzone lover, or a reluctant skeptic like me, I really hope you give this a try soon. Enjoy!


Ingredients for 4 Calzones:
1 batch of our Wolfgang Puck pizza dough (get the recipe here), divided into 4 dough balls
8 slices prosciutto
2 cups ricotta, drained if necessary
4 ounces fresh mozzarella, sliced thin, and drained on paper towel
1 1/2 cup finely diced smoked ham
freshly ground black pepper to taste
cayenne to taste
(note: before folding, I forgot to drizzle the top of the filling with a teaspoon of extra virgin olive oil, which I think would have been a nice touch.)
corn meal for the pan
2 cups marina sauce for dipping, optional
1 egg for egg wash
Parmesan cheese for dusting tops
- Bake at 500 F. for 15 minutes

0 comments:

Roasted tomato sauce

6:33 AM 0 Comments

Untitled

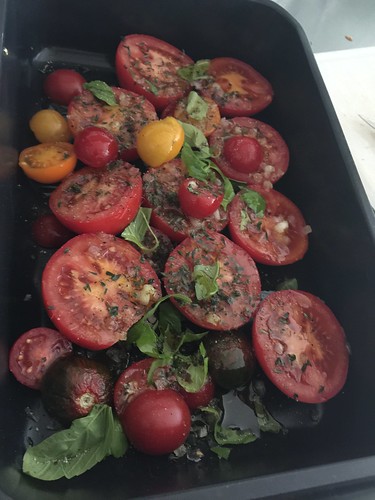
This is one of the simplest but also tastiest sauces you can make. It's perfect when you have tomatoes that are starting to get a little old, soft and wrinkly. Just take those, cut them in half and place cut side up in a roasting tray. Drizzle with olive oil, some chopped garlic and shallots, and a little salt and pepper. Add some fresh herbs if you have them. 

Roast at 200°C for about half an hour. The tomatoes should have softened quite a bit and released some liquid. Tip all the contents of the pan into a mixer. Add a little pinch of sugar and a little apple cider vinegar, and blitz until smooth. (Be careful, it's hot!) 

Pour into a pot and cook until it's as thick as you like it. At this point, you could certainly add some browned beef mince if you'd like. Season to taste with more salt, sugar and vinegar. 


0 comments:

Next Up: Calzone

12:44 PM 0 Comments


0 comments:

Baba Ghanoush – The Day After Dip

6:08 PM 0 Comments

No matter what you’re grilling this summer, chances are good you’re going to have more hot coals than food to cook on it, which makes baba ghanoush the perfect post-barbecue recipe. Instead of those glowing embers going gently into the sweet night, why not grill up some eggplant, and make one of the world’s best vegetable dips?

You can cook the eggplant any way you want, but charcoal is my favorite. Next best would be cooked over a gas burner, but that can really mess up your stove, so I guess the real next best is baked at 400 F. until they collapse, and get very soft.

As you can see in the clip, this is not a very complicated recipe. As long as this is seasoned thoughtfully, you should be enjoying a wonderfully savory, yet refreshing dip. Just be sure to pay attention to the salt. Eggplant, like almost every vegetable, needs a good amount of salt to bring out the flavor.

The difference between a terrible dip, and a stellar spread can be as little as a half teaspoon of salt. Wait for the mixture to cool completely in the fridge, taste it ice-cold, and adjust with more salt, as needed. Same goes for the lemon, cayenne, and the tahini.

If you grill these after a cookout, but have had too much fun, and don’t feel like doing any more work, you can peel them the next day, and this will work out the same. I hope you give this delicious baba ghanoush a try soon. Enjoy!


Ingredients for about 6 cups Baba Ghanoush:
3 or 4 large Italian eggplant
2 cloves crushed garlic
2 tsp kosher salt, or to taste
juice from 1 or 2 lemons, or to taste
3 tbsp tahini, or to taste
pinch of cayenne
3 tbsp extra virgin olive oil
2 tbsp plain Greek yogurt
1 minced fresh mint leaf, optional
2 tbsp chopped fresh Italian parsley leaves
pita chips and vegetables for dipping

0 comments: